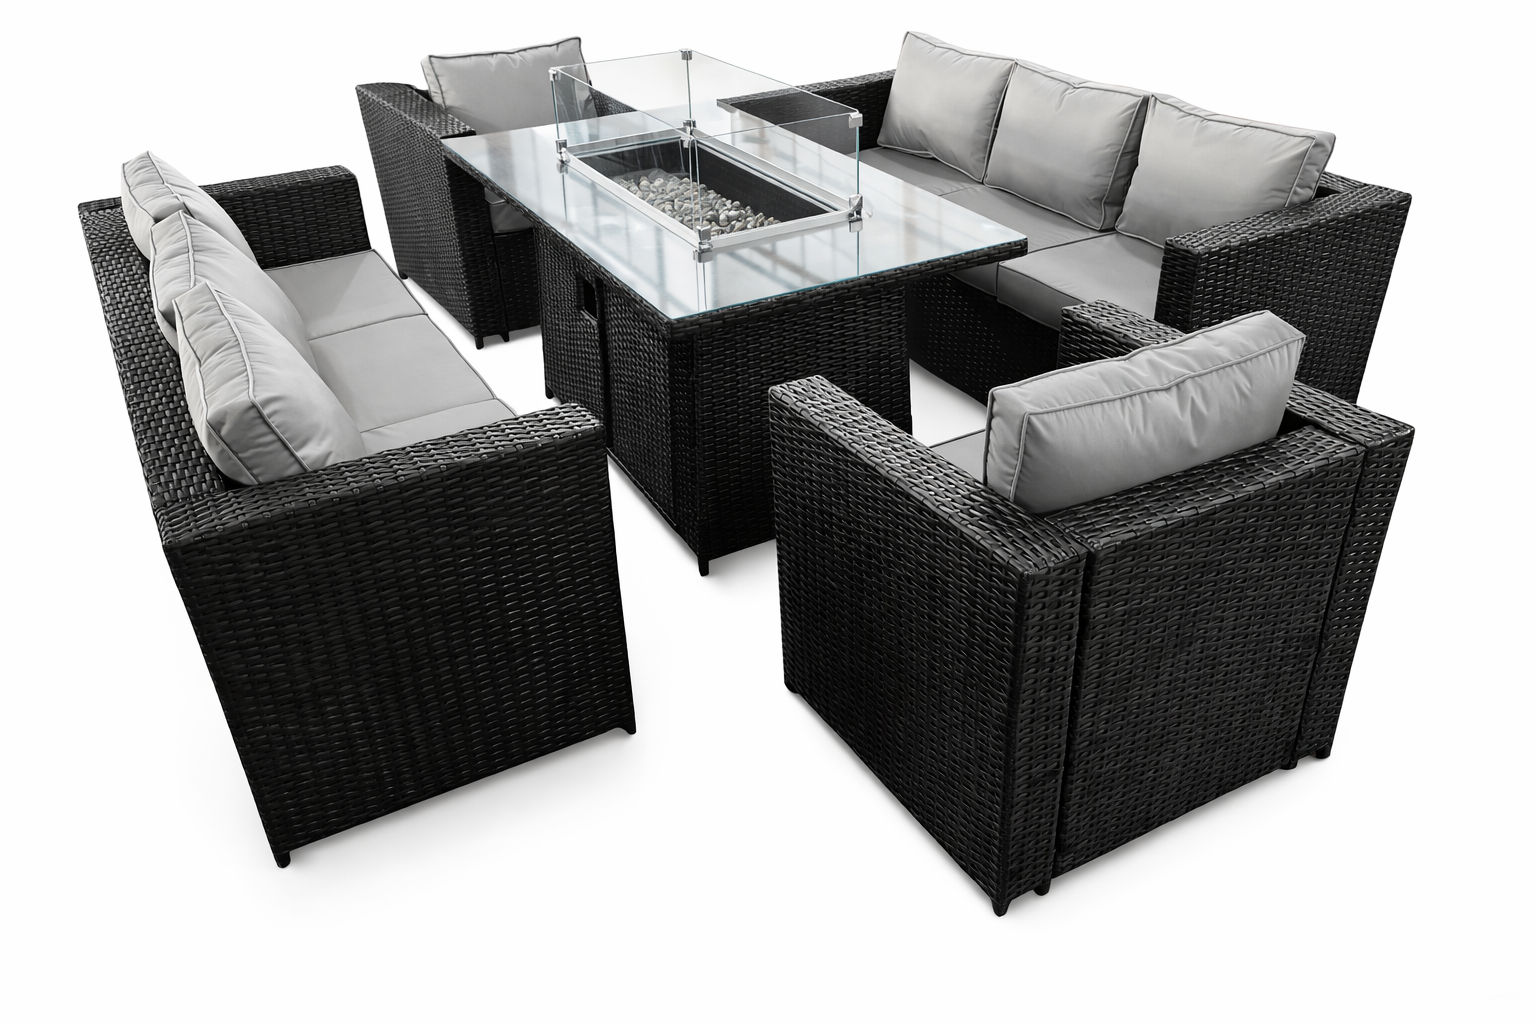
8-Seater Rattan Furniture Set with Firepit
Designed with weather-resistant materials and plush cushions, this set offers the ideal setting for entertaining or relaxing all year round.
8-Seater Rattan Furniture Set with Firepit
Designed with weather-resistant materials and plush cushions, this set offers the ideal setting for entertaining or relaxing all year round.
Product Information
Thank you for choosing our premium 8-seater rattan furniture set with integrated firepit – a perfect blend of style, comfort, and functionality for your outdoor living space. Designed with weather-resistant materials and plush cushions, this set offers the ideal setting for entertaining or relaxing all year round. Please read this manual carefully before assembly and use to ensure safe operation and long-lasting enjoyment.
Safety Information
Safety
Ensure you have read and fully understood the instruction manual and safety advice before using this product.
- Assemble the furniture set exactly as per the instructions provided, using only the tools and hardware included. Do not use substitute parts or fittings.
- Ensure all bolts and fittings are securely tightened before use. Periodically check and re-tighten fixings to maintain structural stability.
- Only place the furniture set on a level, stable surface. Do not install on uneven, sloping, or soft ground, as this may cause instability or tipping.
- Do not use the furniture set until all assembly is completed and confirmed to be stable and secure.
- Always ensure the firepit is properly installed and fully integrated according to the manufacturer’s specifications before use.
- Before igniting the firepit, ensure all gas connections are properly attached and leak-tested as per the instructions. Never use if a gas leak is suspected.
- Only use the firepit in a well-ventilated outdoor area. Never use indoors, in enclosed spaces, or under low-hanging structures.
- Do not leave the firepit unattended while in use under any circumstances.
- Always use the flame guard when the firepit is in operation. Do not operate without the flame guard securely in place.
- Keep all flammable materials, including cushions, clothing, and decorative items, away from the firepit and flame zone.
- Do not wear loose-fitting or flowing clothing when operating the firepit.
- Do not allow children or pets near the firepit while it is on or until all components have cooled down completely.
- Be aware that the glass table surface can become extremely hot during and after firepit use. Do not touch the glass until it has cooled completely.
- Do not lean on, place objects on, or attempt to move the glass table surface when hot.
- Always cover the firepit when not in use using the supplied protective cover to prevent damage, water ingress, and unintentional ignition.
- Store the gas cylinder as instructed by the manufacturer, in an upright position in a well-ventilated area, away from direct sunlight, ignition sources, and out of reach of children.
- Do not exceed the recommended weight limit of 110 kg per seat. Uneven loading or overloading may cause structural failure.
- Do not stand on the table, firepit, or seating units.
- Do not modify any part of the firepit, gas connections, or seating structure. Any unauthorised alteration voids the warranty and may compromise safety.
- Ensure all users are made aware of these safety instructions and understand proper firepit use before operating the product.
GPSR Information
UK GPSR Information
Monster House 19-23 Alan Farnaby Way
Industrial Estate Sheriff Hutton
York YO60 6PG
England
+441347878880
Monster House 19-23 Alan Farnaby Way
Industrial Estate Sheriff Hutton
York YO60 6PG
England
+441347878880
EU GPSR Information
Van Heemskerckweg 28A & B
-
Venlo 5928LL
Netherlands
+441347878880
Van Heemskerckweg 28A & B
-
Venlo 5928LL
Netherlands
+441347878880
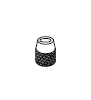
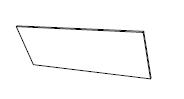
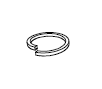
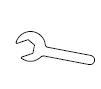
Included Parts


Walkthrough

1- Position Part E (Sofa Extension Frame) next to the assembled sofa section so that the fixing holes line up.
2- Align Part A (Side/Back Frame) with Part E, ensuring the frames sit flush and level.
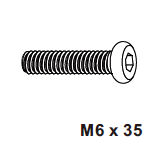
3- Insert Bolt K through the aligned holes from the outside.
4- Secure each fixing point with Screw I, tightening by hand only.
5-Check that the extension frame is straight and properly supported.
⚠️ Important: Do not fully tighten the bolts at this stage. Final tightening should be completed once all sofa sections are fully assembled and aligned.
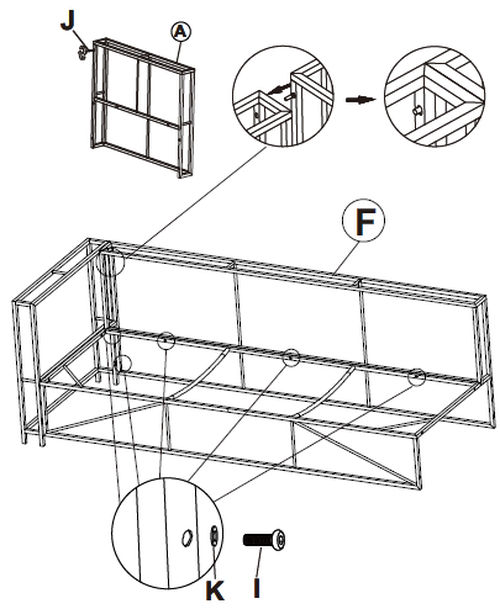
1- Take Part F (Long Back Frame Panel) and position it along the rear of the sofa section.
2-Align the fixing holes on Part F with the holes on the side frame (Part A) and the sofa extension frame.
3-Insert Bolt K through each aligned hole from the outside.
4-Secure using Screw I, tightening by hand only.
Repeat until all fixing points along the back frame are connected.
⚠️ Important: Do not fully tighten the bolts yet. Once all sofa sections are assembled and aligned, tighten all bolts securely.
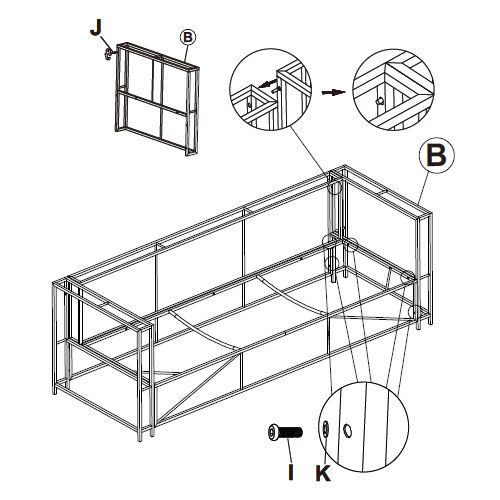
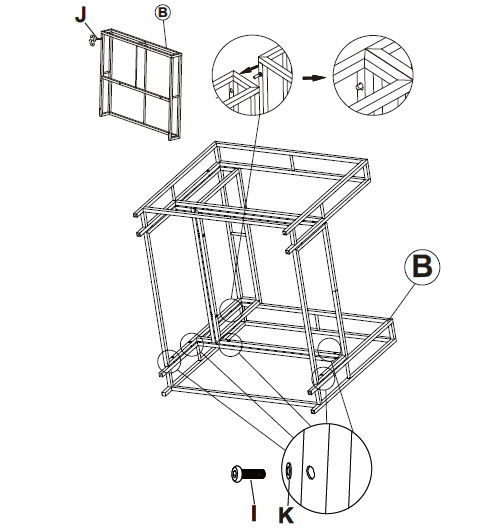
1- Position Part B (End Frame Panel) at the open end of the sofa section.
2- Align the fixing holes on Part B with the holes on the sofa frame and back frame.
3- Insert Bolt K through the aligned holes from the outside.
4- Secure each fixing point with Screw I, tightening by hand only.
5-Ensure the end frame sits square and level with the rest of the sofa.
⚠️ Important: Do not fully tighten the bolts yet. Final tightening should be done once the entire sofa assembly is complete and aligned.
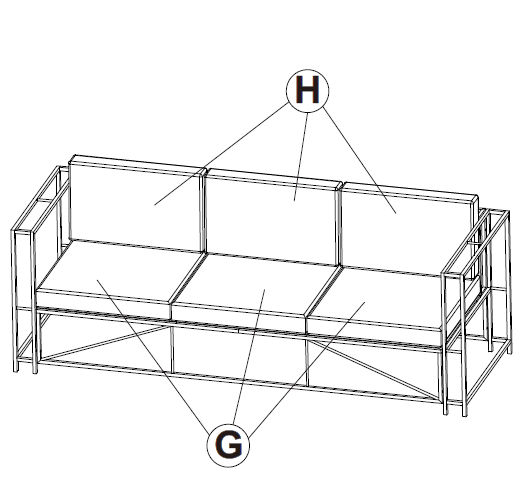
1- Place Part G (Seat Cushions/Base Panels) evenly across the sofa frame, ensuring each cushion sits flat and is fully supported.
2- Position Part H (Back Cushions) along the rear frame, aligning them upright and evenly spaced.
3- Adjust all cushions so they are centred and level for a neat appearance.
✅ Final Step: Once all cushions are in place and the sofa is correctly aligned, fully tighten all bolts and screws. Check the sofa is stable before use.
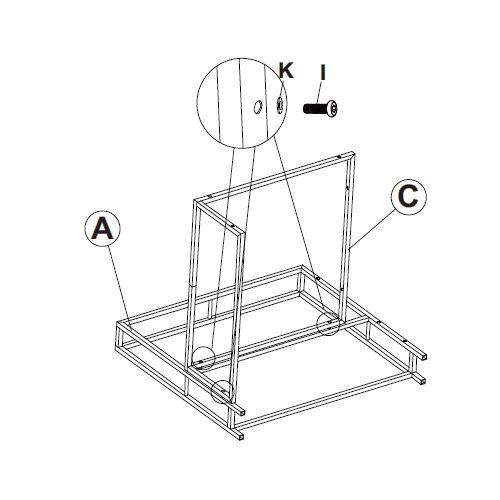
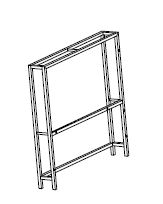
1- Place Part A (Base Frame) on a flat, stable surface with the open side facing up.
2-Position Part C (Upright Side Frames) onto the base frame, aligning the pre-drilled holes at the bottom of each upright with the holes on the base.
3-Insert Bolt K through the aligned holes from the outside.
4- Secure each bolt using Screw I, tightening lightly by hand.
5-Repeat for all upright frames, ensuring everything is correctly aligned.
⚠️ Important: Do not fully tighten the bolts at this stage. Leave them slightly loose to allow adjustment in the next assembly steps.
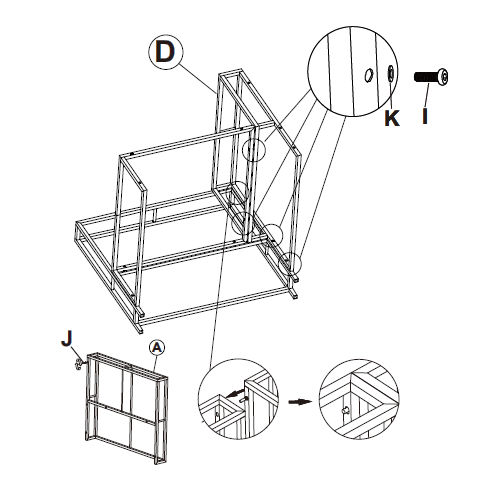
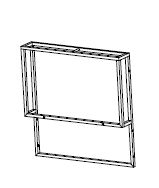
1- Take Part A (Back Rest Panel) and position it at the back of the sofa base, aligning it with the upright frames already fitted.
2- Ensure the pre-drilled holes on the rear frame line up with the holes on the side uprights (Part D).
3- Insert Bolt K through the aligned holes from the outside.
4- Secure each bolt using Screw I, tightening by hand.
5- Repeat on all fixing points until the rear frame is fully attached.
⚠️ Important: Do not fully tighten the bolts yet. Leave them slightly loose to allow adjustment during the next assembly steps.
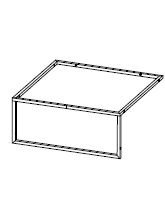
1- Take Part B (Side Panel) and position it at the front of the sofa base.
2- Align the fixing holes on Part B with the holes on the side and base frames.
3- Insert Bolt K through each aligned hole from the outside.
4- Secure using Screw I, tightening by hand only.
5- Repeat for all fixing points until the side panel is correctly in place.
⚠️ Important: Do not fully tighten any bolts at this stage. Final tightening will be completed once all sections are assembled and aligned.
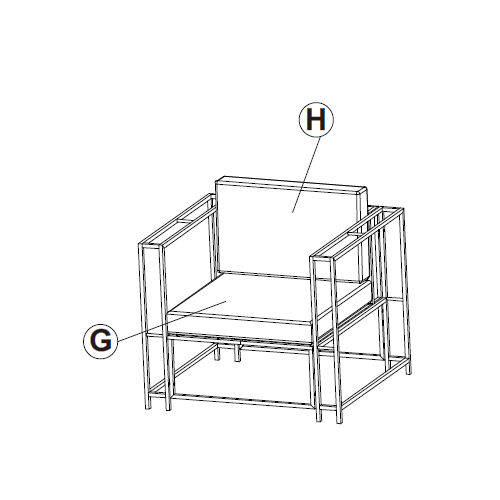
1- Place Part G (Seat Cushion/Base Panel) onto the assembled frame, ensuring it sits flat and evenly within the frame.
2- Position Part H (Back Cushion/Backrest Panel) against the rear frame, aligning it securely with the back support.
3-Adjust both cushions so they are centred and properly supported by the frame.
✅ Final Check: Once all previous steps are complete and the unit is correctly aligned, fully tighten all bolts and screws. Ensure the chair is stable before use.
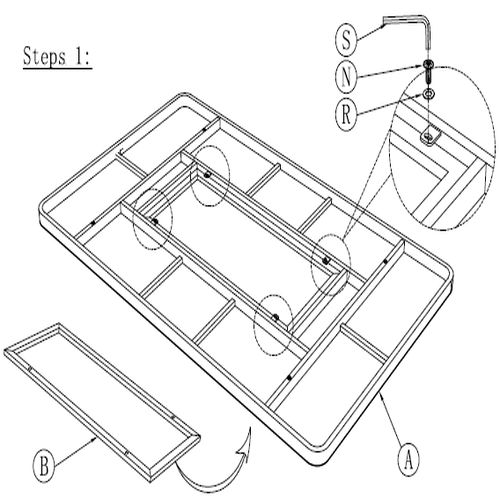
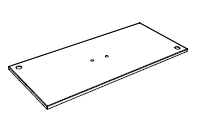
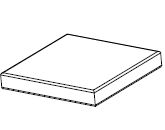
1. Lay Part A flat on the floor with the underside facing up.
2. Position Part B so it aligns with the central frame on Part A.
3. Use hardware parts R, N, and S to secure Part B.
4. Insert Part R through the pre-drilled holes in Part B.
5. Add Part N and then screw in Part S using the provided Allen key.
6. Tighten all connections securely but avoid over-tightening to prevent damage.
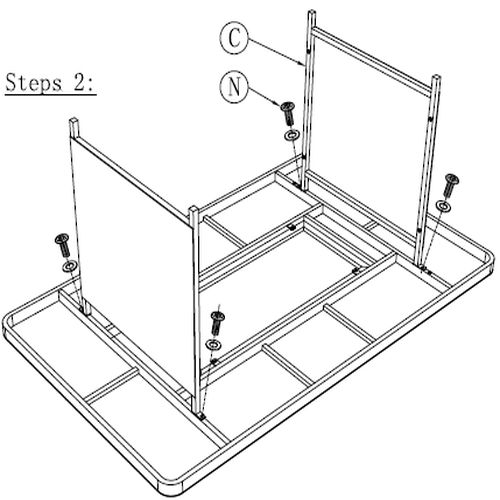
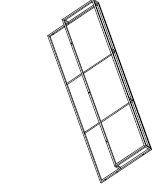
1. Take Parts C and position them upright on the frame assembled in Step 1. 2. Align the bottom ends of Part C with the pre-drilled holes in the base frame (Part A). 3. Insert bolts through the holes in Part C and into the base. 4. Place a Part N on each bolt before tightening. 5. Secure all bolts firmly using the appropriate tool, but do not over-tighten.
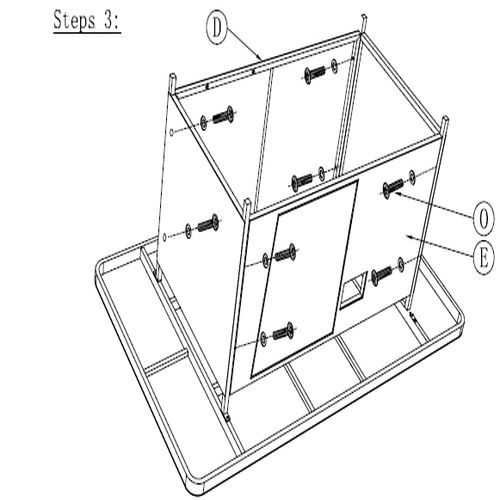
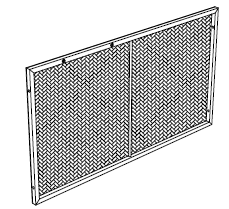
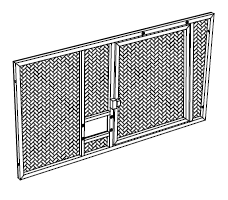
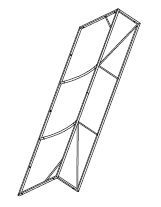
1. Position Parts D vertically between the upright supports assembled in Step 2.
2. Place Part E to fit snugly between the two side panels.
3. Align all panels with the pre-drilled holes on the side frames.
4. Secure each panel using Parts O, inserting them through the frame and into the panels.
5. Ensure all screws are tightened evenly and securely using the appropriate tool, but do not over-tighten to avoid damaging the panels.
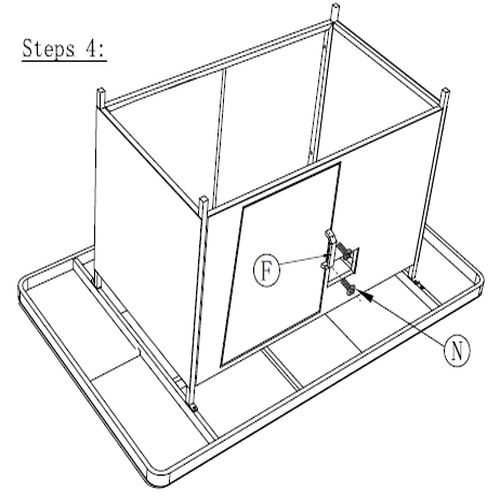
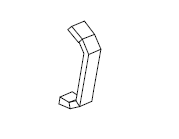
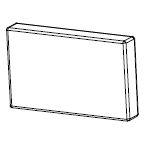
1. Take Part F and align it with the opening on Part E from Step 3.
2. Attach the hinges on Part F to the frame using the Part N.
3. Ensure the door opens and closes smoothly and is securely fastened.
4. Tighten all screws carefully, ensuring the door is level and not over-tightened to prevent hinge damage.
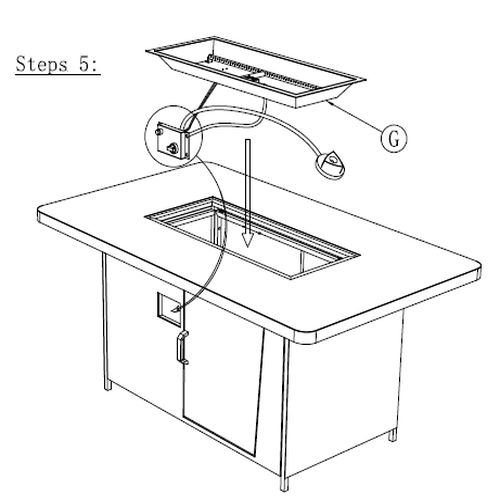
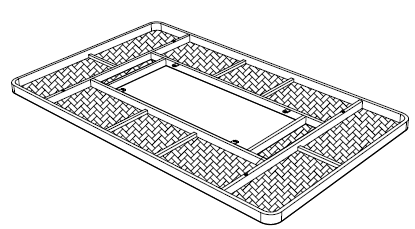
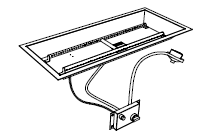
1. Carefully lower Part G into the centre opening of the tabletop, ensuring it is level and properly seated in the support frame.
2. Align the pre-attached gas hose and igniter wires from the fire pit tray with the internal connection points inside the table housing.
3. From underneath, route the gas hose through the designated access point and secure it using the fixings provided.
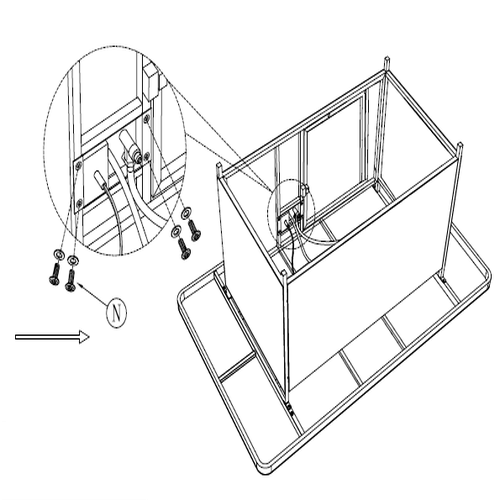
4. Use Part N, firmly attach the gas control box and igniter components to the frame, as shown in the detailed inset diagram.
5. Ensure that all gas hose connections are tight and sealed, and that electrical wires are connected correctly to the igniter switch.
6. Refer to the manufacturer’s instructions for the safe connection of the gas regulator (not shown) to the fuel source (e.g. propane tank).
7. Confirm that the gas hose is not kinked, pinched, or in contact with any hot or moving parts.
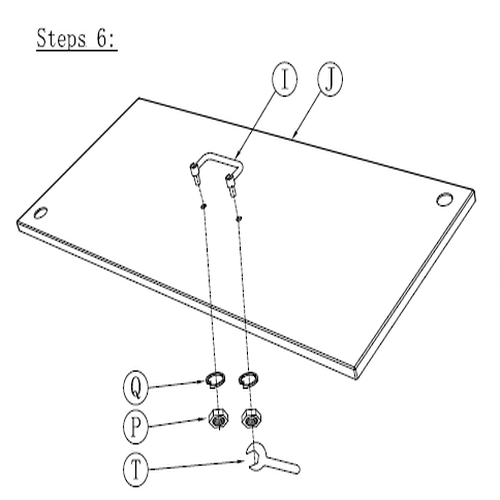
1. Attach Part I to Part J using Parts Q, P and T.
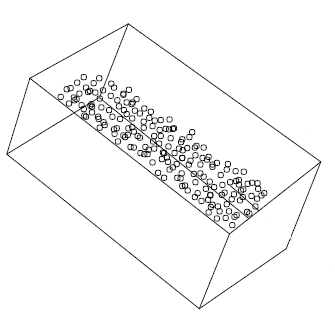
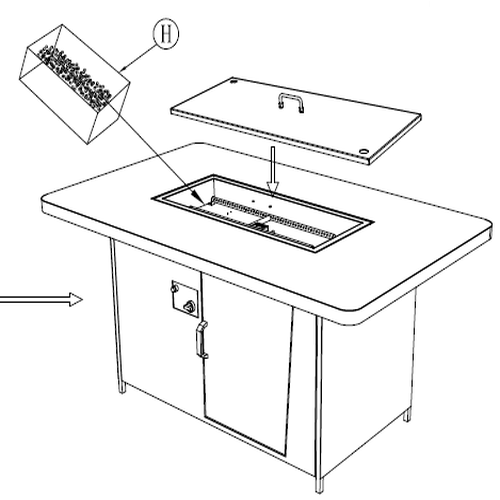
2. Pour Part H into the burner tray.
3. Place Part J over the opening of the table.
Note: Ensure the cover sits flat and the fire glass does not block the burner ports.
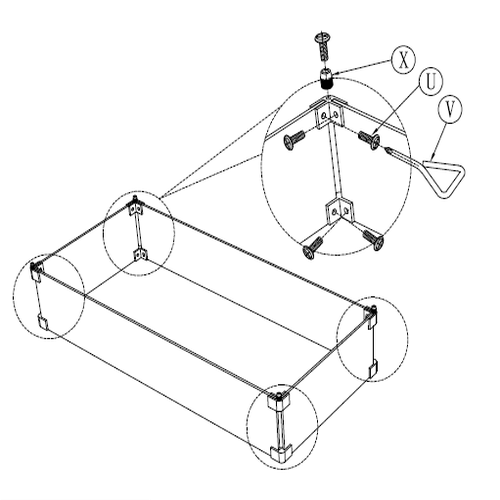
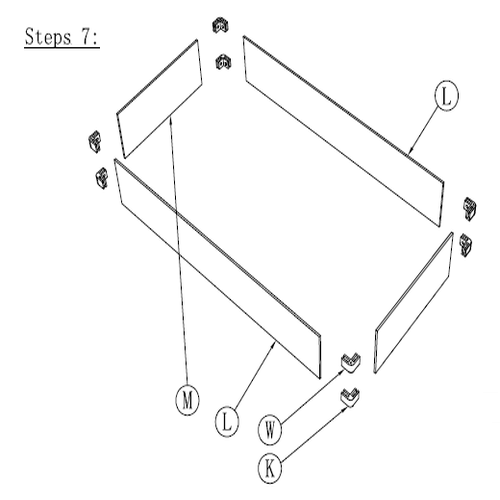
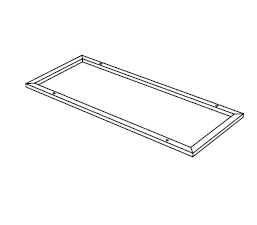
1. Join the Parts L and M using Parts K and W.
2. Secure each corner with the Part X.
3. Tighten all fixings using Parts U and V.
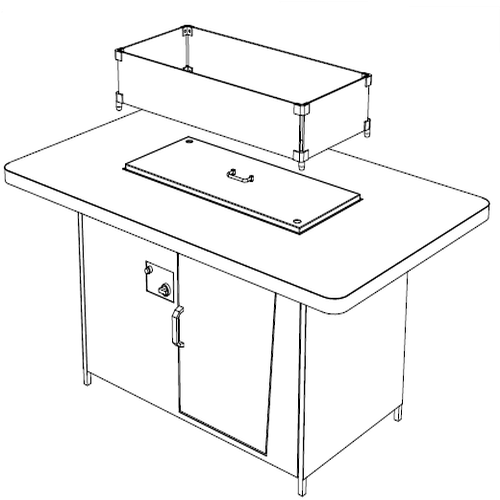
4. Carefully place the assembled glass panels onto the top of the fire pit table, around the burner opening.
Note: Handle glass panels with care and ensure the wind guard sits evenly and securely.
* Inspect all bolts, screws, and fixings every month and tighten as necessary to maintain structural integrity. * Check the frame regularly for signs of rust, corrosion, or fatigue, particularly at joints and load-bearing points. * Clean rattan surfaces using a soft cloth or brush and mild soapy water. Avoid pressure washers or harsh abrasives that may damage the material. * Avoid prolonged exposure to direct sunlight to reduce the risk of fading or drying out of the rattan weave. * During prolonged periods of non-use or adverse weather (heavy rain, snow, or frost), store the furniture under cover or indoors if possible. * Wipe down the glass table surface regularly with a non-abrasive glass cleaner. Avoid using rough cloths or scouring pads to prevent scratching. * Check the glass panel for chips or cracks before each use. Do not use the table if the glass is damaged. * Clean the firepit components regularly, removing any food residue, soot, or debris build up, especially around the burner. * Inspect the firepit's gas regulator, hose, and connections before each use for signs of wear, cracking, or leaks. * Do not allow water to enter the firepit burner. Always use the supplied cover when the firepit is not in use. * Remove and wash cushion covers as needed using a gentle machine wash with mild detergent. Do not tumble dry or iron. * Allow covers to fully air dry before reapplying to cushions to avoid mould or moisture damage.
Troubleshooting
A: If there appears to be any part missing from your package contact our Customer Support team via the details on the Contact Us page within 7 days of receipt.