

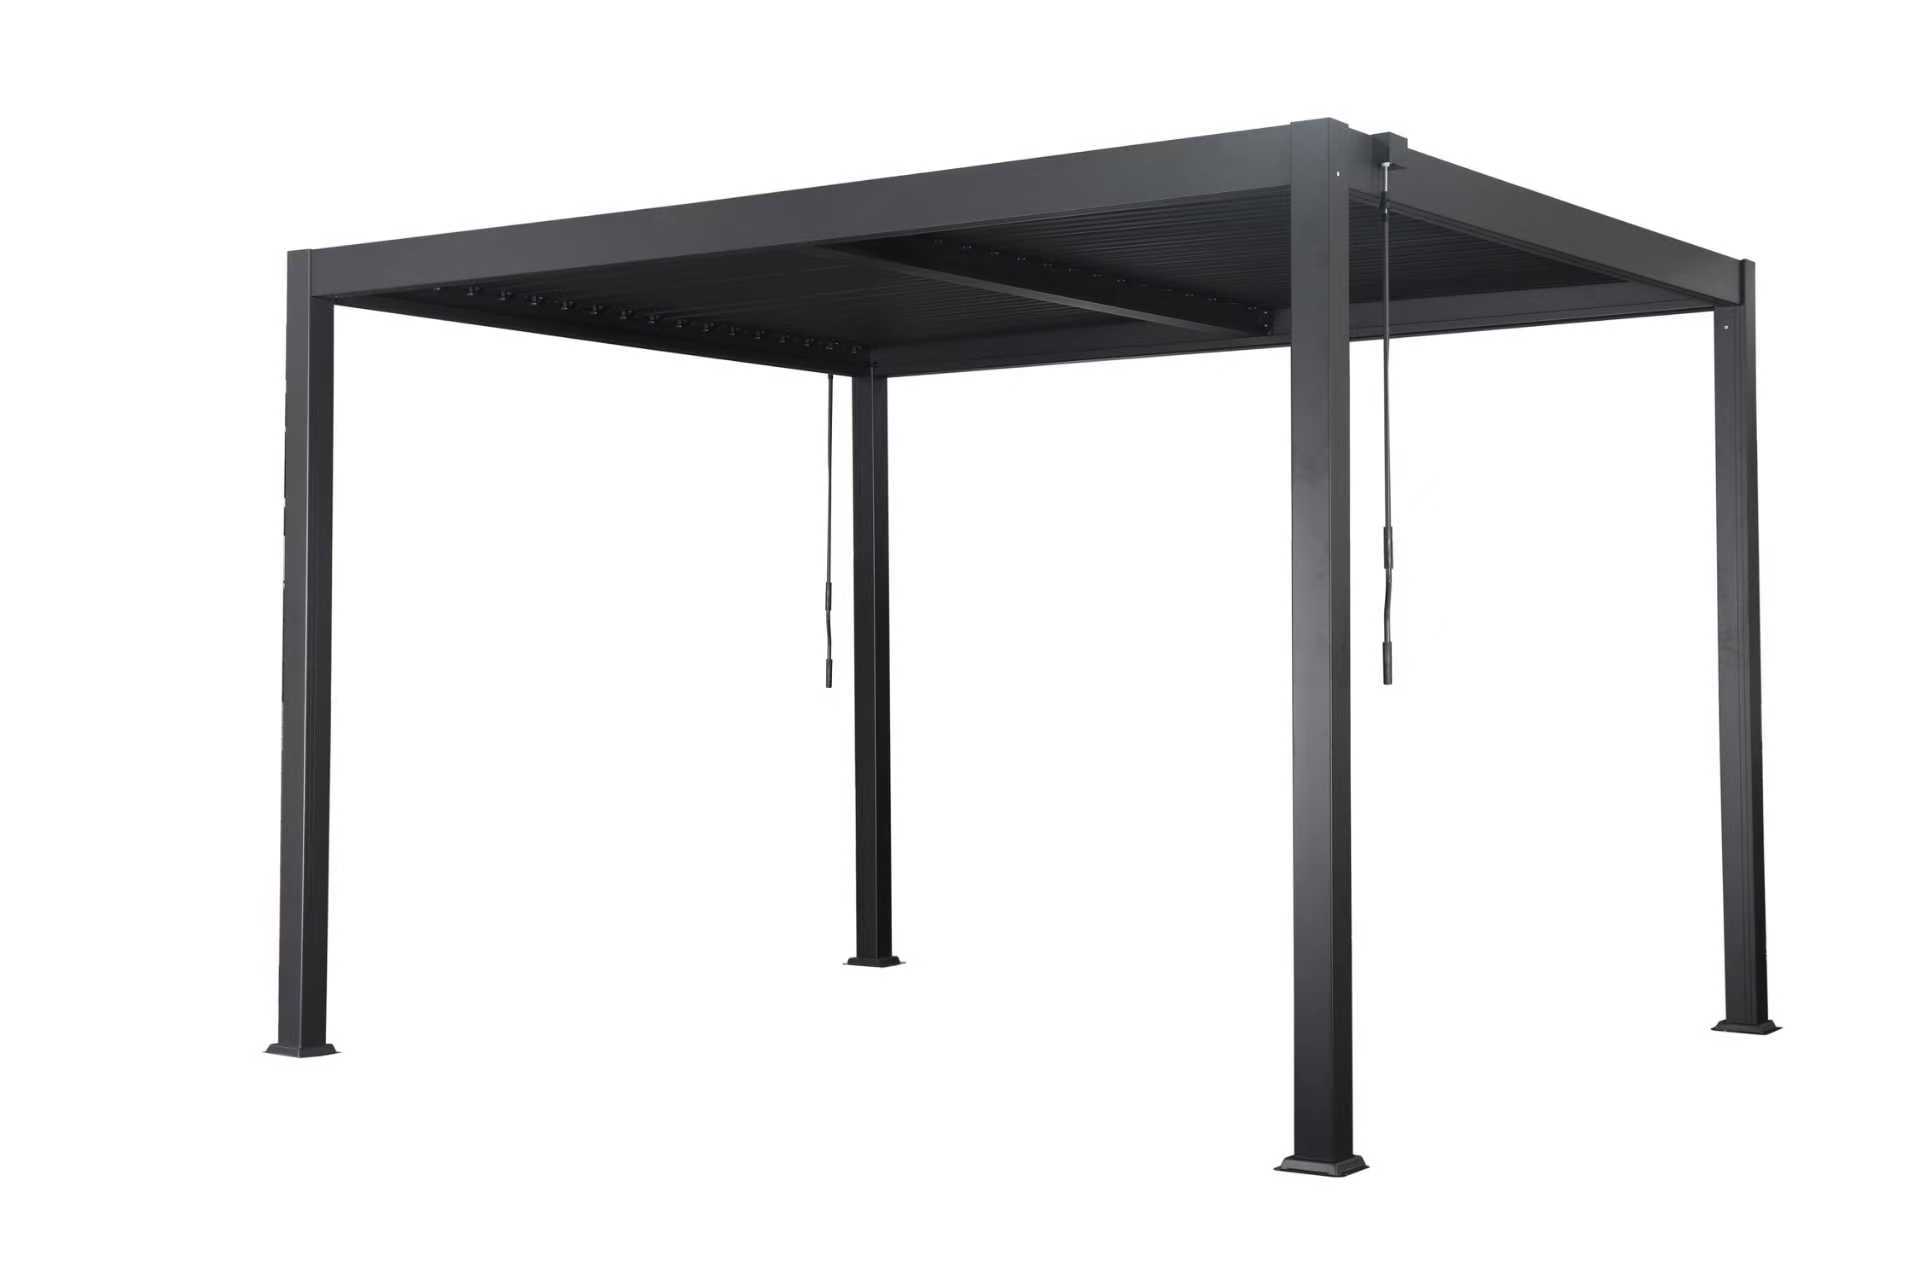
Aluminium Pergola 4x4m
This guide provides step-by-step instructions for assembling components and using your Jardi Aluminium Pergola.
Aluminium Pergola 4x4m
This guide provides step-by-step instructions for assembling components and using your Jardi Aluminium Pergola.
Product Information
This 4x4m aluminium pergola provides a durable outdoor shelter solution with a modern anthracite finish, designed to create a practical and stylish covered area for gardens, patios and other suitable outdoor spaces. Available with four blinds, integrated LED lighting, or a combination of four blinds and LED lighting, allowing the pergola to be configured for additional shade, privacy and illumination.
| SKU | 218890 | 218892 | 218894 | 218896 |
|---|
Safety Information
General Safety
- Ensure you have read and fully understood the instruction manual and safety advice before using this product.
- This product is intended solely for use as a permanently positioned outdoor pergola providing shelter, shade and, where fitted, privacy blinds and LED lighting.
- This product is intended for domestic outdoor use by competent adults. Children and vulnerable persons must be supervised when near the pergola, particularly during assembly or when blinds are being operated.
- Do not use the pergola for any purpose other than its intended use, including as a climbing frame, lifting structure, storage platform or support for hammocks, swings or other suspended loads unless specifically approved by the manufacturer.
- Keep children, pets and unauthorised persons away from the assembly area until installation is complete and all tools, fixings and packaging materials have been removed.
- Keep the area beneath and around the pergola free from unnecessary obstructions and trip hazards.
- Take care when the ground beneath the pergola is wet, icy or contaminated, as surfaces may become slippery.
- Packaging materials, plastic bags, straps and small components may present suffocation or choking hazards. Keep them away from children and dispose of them responsibly after installation.
Installation and Assembly
- Install the pergola only on a level, stable and structurally suitable surface capable of supporting the complete structure and any forces imposed by wind and normal use.
- Securely anchor the pergola to the installation surface using suitable fixings or anchors appropriate for that surface. Never rely solely on the weight of the structure to keep it stable.
- The suitability of the installation surface and fixing method must be assessed before installation. If there is any uncertainty regarding the substrate, foundations or required fixings, obtain advice from a suitably competent person.
- Assemble the pergola strictly in accordance with the supplied instruction manual and ensure all posts, beams, roof components, braces, fixings, covers and accessories are correctly installed and securely tightened before use.
- Use two or more capable adults to assemble, position or move large or heavy components. Do not attempt to lift or position long aluminium sections without adequate assistance.
- Use appropriate manual-handling techniques during assembly and avoid lifting loads beyond your individual capability.
- Wear suitable protective gloves during assembly and maintenance to reduce the risk of cuts, scratches and injuries from aluminium edges, fixings and components.
- Suitable protective footwear should be worn during assembly to reduce the risk of injury from dropped components or tools.
Structural Safety
- Inspect all components before assembly. Do not install or use any component that is bent, cracked, excessively scratched, corroded, deformed, has sharp exposed edges or otherwise appears structurally compromised.
- Ensure all protective caps, covers and finishing components are correctly fitted so that sharp edges and exposed fixings do not present an injury risk.
- Do not modify, drill, cut, weld or otherwise alter structural components unless specifically permitted by the manufacturer, as this may weaken the structure and affect its stability.
- Never climb, stand, sit or walk on the pergola roof, beams, blinds or other structural components.
- Do not place ladders against the pergola unless the structure and ladder can be used safely without placing excessive sideways or impact loads on the pergola. Use an independently supported ladder wherever possible.
- Do not hang heavy objects from the roof, beams or blinds unless the manufacturer specifically confirms that the structure and attachment point are designed for that load.
- Do not exceed any load limits specified in the instruction manual. Where no additional suspended-load capacity is specified, the pergola must not be treated as load-bearing storage or lifting equipment.
- Do not attach tarpaulins, temporary covers, signage or other large sheet materials to the pergola unless specifically approved, as these may significantly increase wind loading and cause instability or structural failure.
- Do not enclose the pergola using additional panels or coverings not designed for the product, as this may alter wind loading, ventilation and structural behaviour.
- Do not use the product if structural fixings or anchoring points are missing, damaged or insecure.
Wind, Snow & Adverse Weather
- Strong winds and adverse weather can create significant forces on the pergola. Keep the structure correctly anchored at all times and do not leave an inadequately secured pergola in an exposed location.
- Inspect the entire structure and its ground fixings after strong winds, storms or other severe weather before allowing further use.
- Stop using the pergola immediately if it becomes loose, unstable, tilted or visibly distorted, and prevent access until the cause has been identified and corrected.
- Do not allow excessive snow, ice, standing water, leaves, branches or other debris to accumulate on the roof or upper structure.
- Remove snow, ice and debris safely from ground level wherever possible. Never climb onto the pergola roof to clear accumulated material.
- Take particular care when removing snow or ice, as falling material may cause injury. Keep other persons away from the area beneath and around the pergola while clearing it.
- Do not use the pergola if excessive snow, ice or other loading has caused visible deformation or damage. Have damaged components inspected and replaced before further use.
- Keep roof drainage paths and openings clear where applicable to prevent water accumulation and unintended loading.
LED Lighting & Electrical Safety
- Where LED lighting is fitted, install and connect the lighting system strictly in accordance with the supplied instructions.
- Use only the supplied or manufacturer-approved LED components, power supplies, transformers, controllers, connectors and replacement parts.
- Ensure all electrical components intended for outdoor installation are installed and protected as specified by the manufacturer.
- Do not modify electrical cables, connectors, LED fittings or power-supply components.
- Inspect LED cables, connectors, fittings and power-supply components before use. Do not energise the lighting system if any part is damaged, loose, exposed, excessively worn or showing signs of overheating.
- Keep electrical connections protected from water ingress and direct water exposure. Do not allow plugs, connectors or other components that are not specifically designed for exposure to water to become wet.
- Never handle electrical plugs, connectors or controls with wet hands.
- Disconnect the LED lighting from its power supply before installation, inspection, cleaning, maintenance or replacement of electrical components.
- Do not pull, crush, sharply bend or trap electrical cables between structural components, blinds, furniture or other objects.
- Route electrical cables so they do not create trip hazards and cannot be damaged by foot traffic, garden equipment, doors or moving blinds.
- Do not operate the LED lighting system if water ingress is suspected. Disconnect the power safely and have the system inspected before further use.
- Do not attempt electrical repairs unless competent and authorised to do so. Replace damaged electrical components with suitable manufacturer-approved parts.
- Where connection to a mains electrical supply requires fixed wiring or other specialist electrical work, installation must be carried out by a suitably qualified person in accordance with applicable electrical regulations.
- Do not cover LED fittings, transformers, power supplies or other electrical components with materials that could prevent heat dissipation.
- Keep combustible materials away from electrical components that become unusually warm and stop using the lighting immediately if there is burning, smoke, unusual odour, discolouration or excessive heat.
- Do not remove, obscure or alter electrical ratings or identification markings supplied with the product.
- LED fittings, power supplies, controllers and other electrical or electronic components must not be disposed of with general household waste where separate electrical and electronic waste collection is required.
- For versions fitted with LED lighting, periodically inspect cables, seals, connectors, fittings and power-supply components for deterioration or water ingress and replace damaged parts before reconnecting the supply.
- Avoid direct saturation of electrical components when cleaning the pergola.
- After severe weather, inspect the electrical equipment before returning the pergola to normal use.
- Any electrical fault must be corrected before continued use. If safe repair cannot be confirmed, discontinue use and contact the manufacturer, supplier or a suitably competent professional.
Blind Safety
- When blinds are fitted, operate them only using the intended mechanism and in accordance with the supplied instructions.
- Retract, open or otherwise secure the blinds in accordance with the instruction manual before strong winds or severe weather. Do not leave blinds extended where wind may cause excessive loading, tearing or structural movement.
- Do not operate the blinds during severe winds or other conditions in which sudden movement could cause loss of control or injury.
- Keep hands, fingers, hair, jewellery, loose clothing and other objects away from moving blind components, guides and mechanisms to reduce the risk of trapping, pinching or entanglement.
- Do not force a blind that is jammed, obstructed, frozen or difficult to operate. Identify and rectify the cause before continuing.
- Do not allow children to operate the blinds unsupervised or play with blind mechanisms, cords, handles or moving components.
- Stop using any blind immediately if its mechanism, guides, fixings or fabric become damaged, loose or excessively worn.
- Ensure the area around a moving blind is clear of people, pets, furniture and other obstructions before operation.
Heat & Fire Safety
- Never use naked flames, barbecues, patio heaters, fire pits or other significant heat sources directly beneath or immediately adjacent to the pergola unless their manufacturer specifies adequate safe clearances and the pergola materials cannot be exposed to excessive heat.
- Maintain adequate clearance between the pergola, blinds and any heat-producing appliance. Radiant heat and flames can damage finishes, blinds, cables and structural components and may create a fire risk.
GPSR Information
UK GPSR Information
Monster House 19-23 Alan Farnaby Way
Industrial Estate Sheriff Hutton
York YO60 6PG
England
+441347878880
Monster House 19-23 Alan Farnaby Way
Industrial Estate Sheriff Hutton
York YO60 6PG
England
+441347878880
EU GPSR Information
Van Heemskerckweg 28A & B
-
Venlo 5928LL
Netherlands
+441347878880
Van Heemskerckweg 28A & B
-
Venlo 5928LL
Netherlands
+441347878880
Included Parts







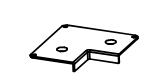
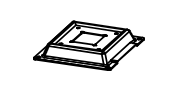
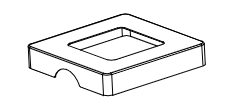

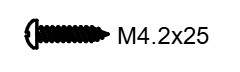
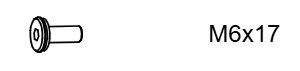
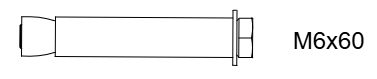
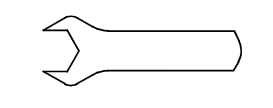
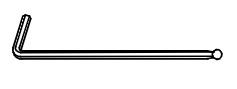
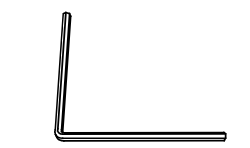
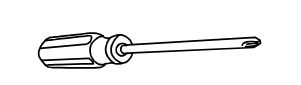
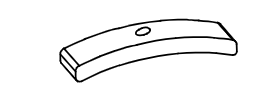
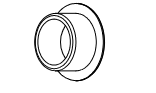

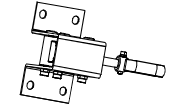
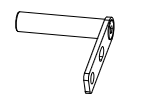
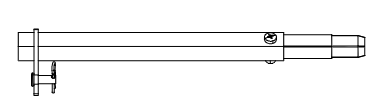


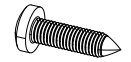
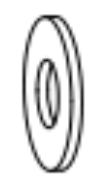
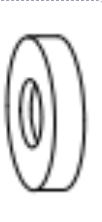
Monster Manual
Aluminium Pergola Assembly
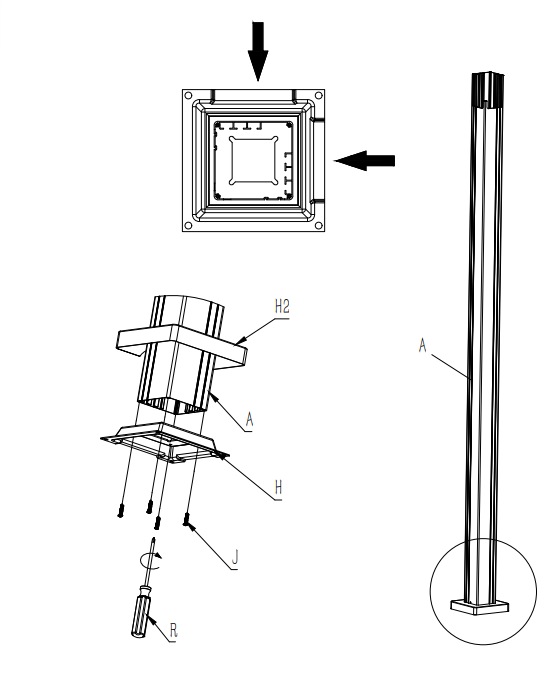
- Slide the feet covers (Part H2) onto the legs (Part A).
- Attach the feet (Part H) to the legs (Part A) using screws J.
- Repeat with all 4 legs (part A).
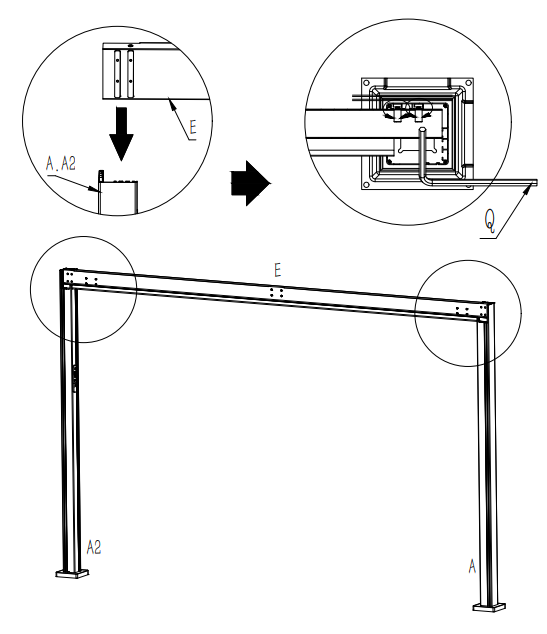
- Loosen the bolts on the edge of Part E (shown with the arrow in the picture below).
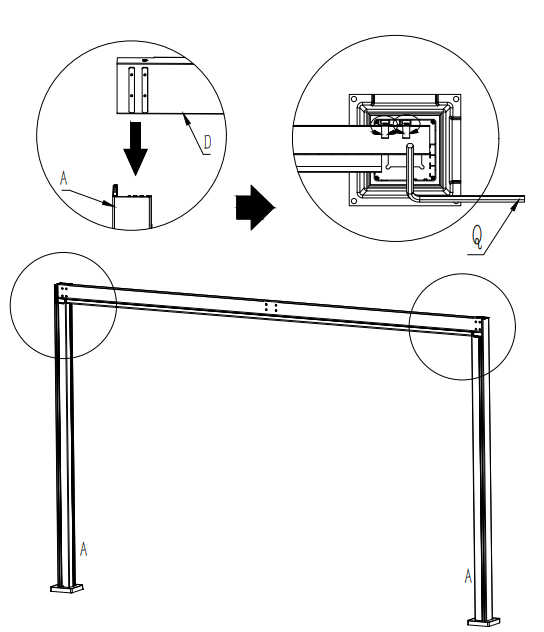
- Slot the top bar (Part E) into the groves on the legs (Part A) as pictured below.
- Tighten the bolts to hold the top bar (Part E) into place.
- Repeat with the opposite edge of E to create the assembled piece.
- Repeat with the other two legs (Part A).
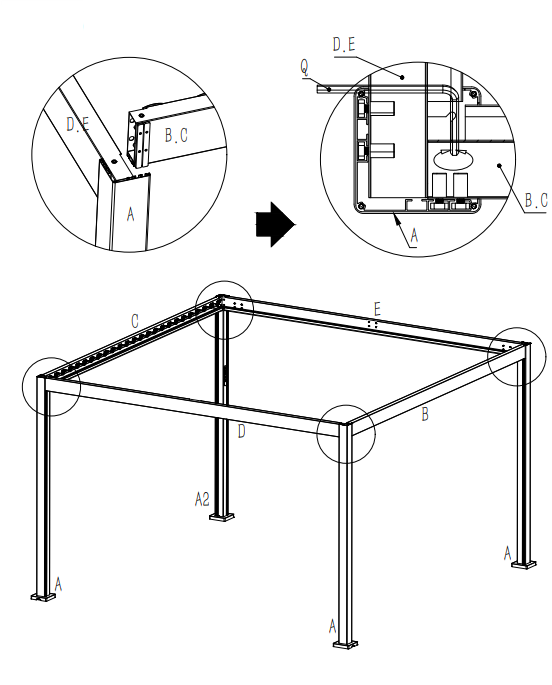
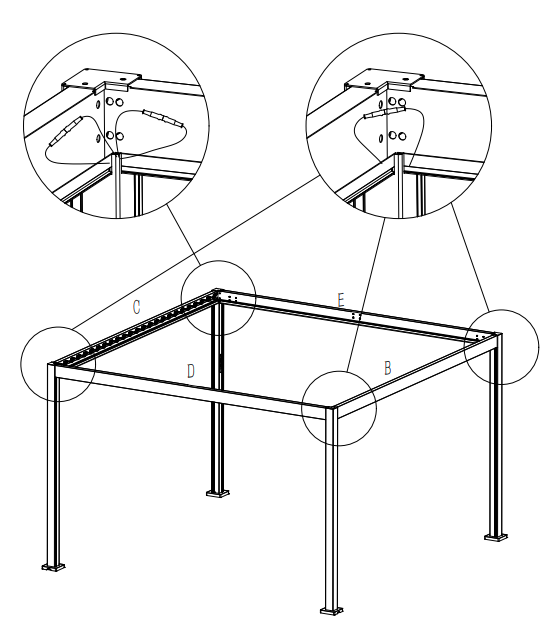
- Loosen the bolts on the edge of Part B.
- Slot the top bar (Part B) into the groves on the legs (Part A) as pictured below.
- Tighten the bolts to hold the top bar (Part B) into place.
- Repeat with the opposite edge of Part B to create the assembled frame.
- Repeat with the other two corners.
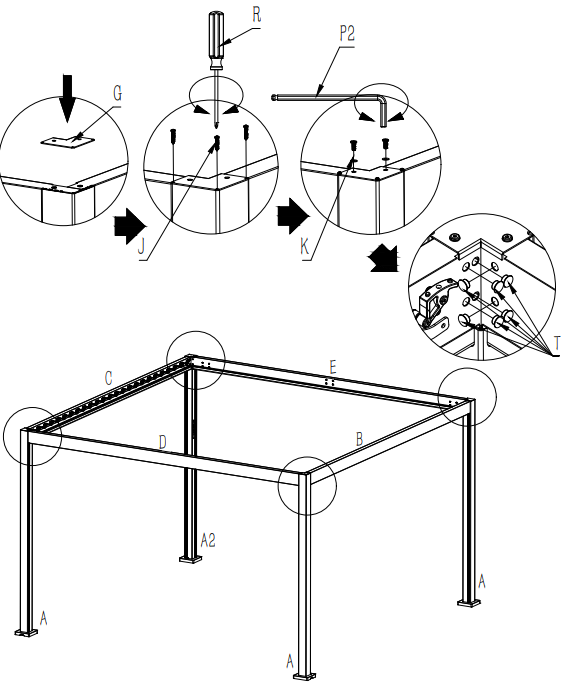
- Place Part G onto the top of each corner of the assembled frame.
- Secure into place with 3 x Part J screws and 2 x Part K bolts and washers.
- Cover the indicated holes using Part T as pictured below.
If an LED Pergola:
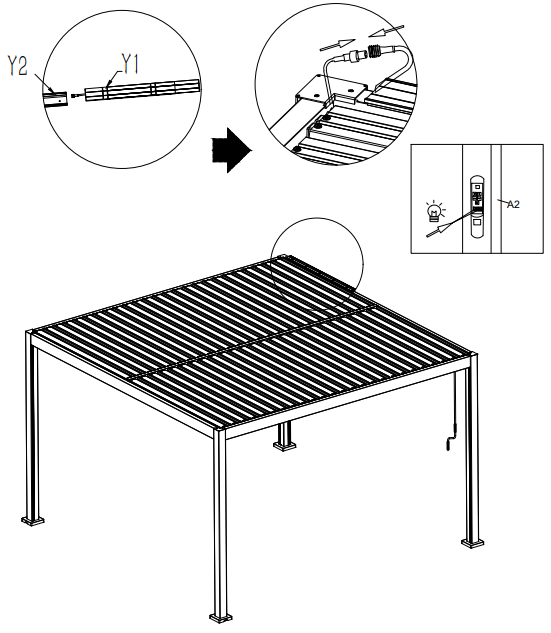
- Connect the wires together at each corner on the pergola structure.
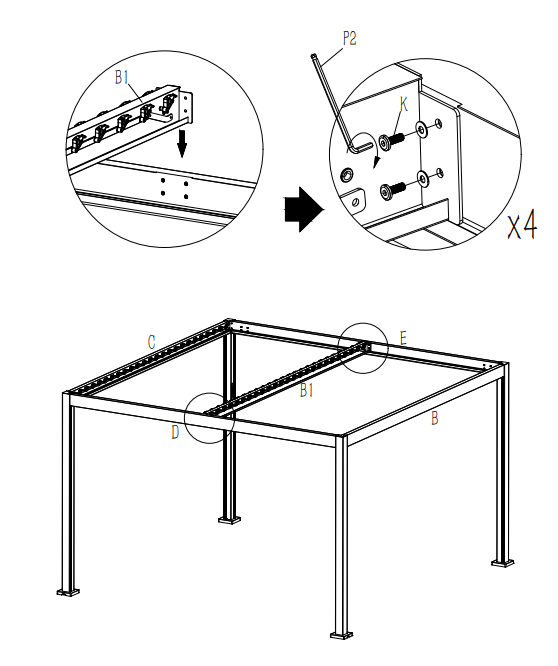
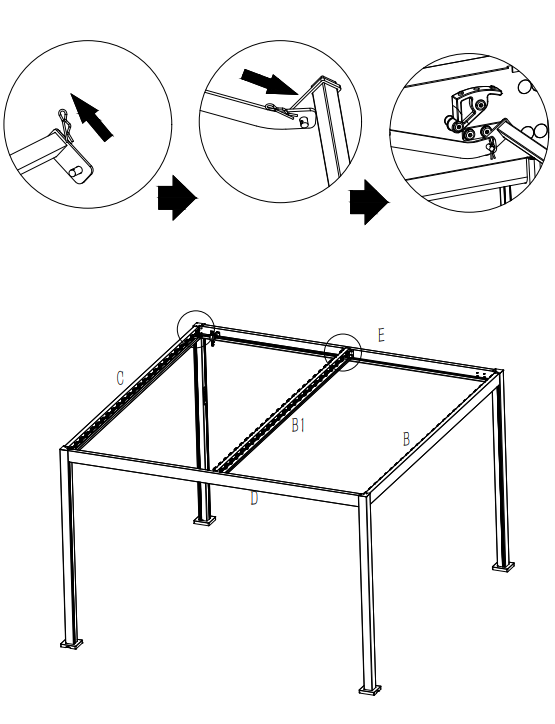
- Attach the central bar (Part B1) to the centre of each Part E using bolt and washers (Part K).
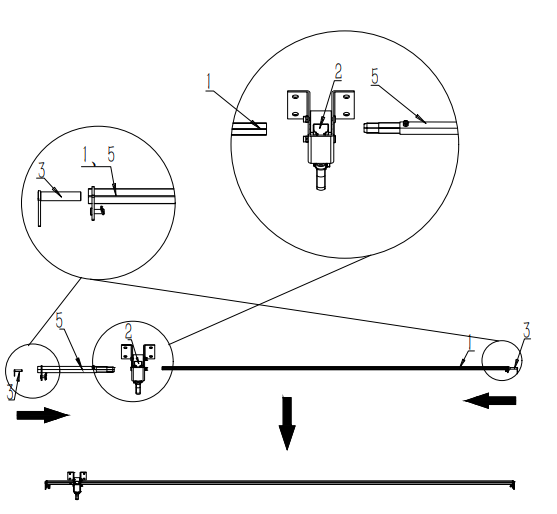
- Slot Part 1 and Part 5 into either side of Part 2
- Slide Part 3 into each end of the handle mechanism
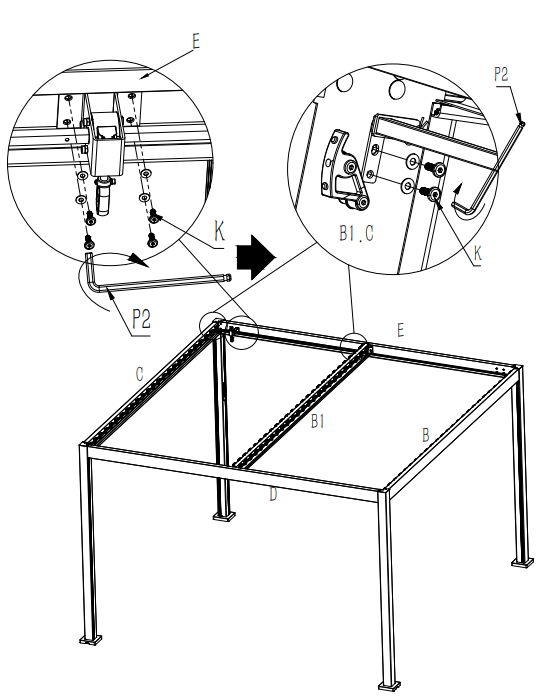
- Place the crank mechanism to the pergola.
- Attach Part 2 to Part E using the K bolts and washers provided. Secure with Part P2.
- Attach Parts 3 to Part C and Part B1 using the K bolts and washers provided. Secure with Part P2.
- Secure into place using the pins on each corner.
- Repeat on the opposite side of the pergola.
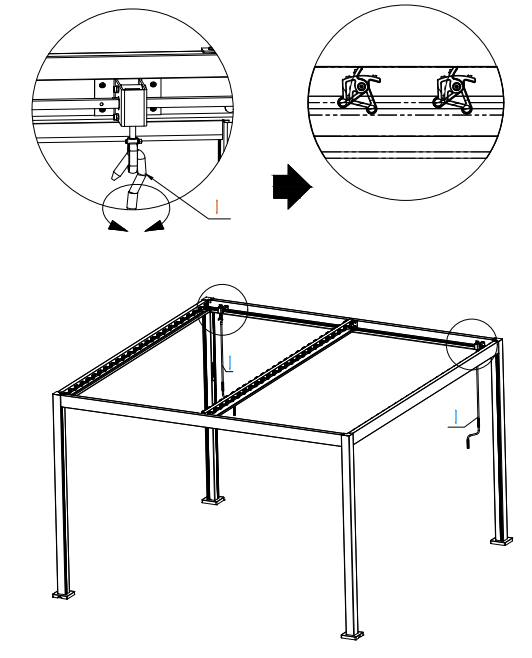
- Hook the handles (Part I) into Part 2 that you have attached to the frame in the previous step.
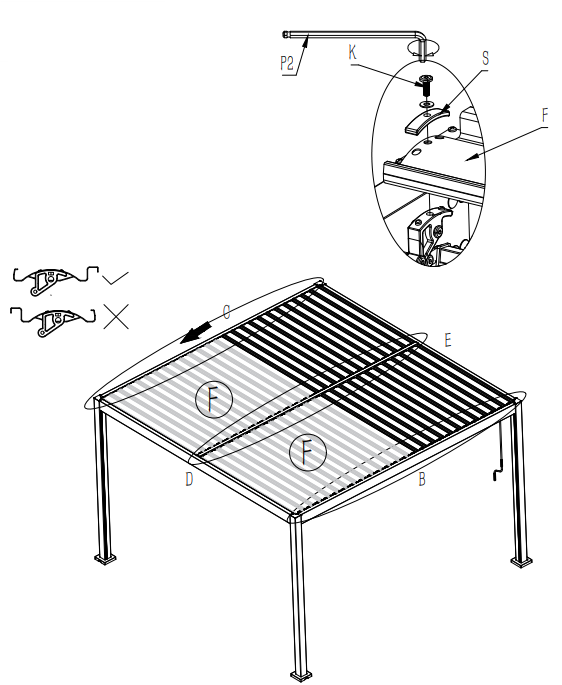
- Place the louvres (Part F) so they lie parallel to Part E.
- Place Part S onto both short edges of each Part F.
- Secure into Part B using Part K bolts and washers.
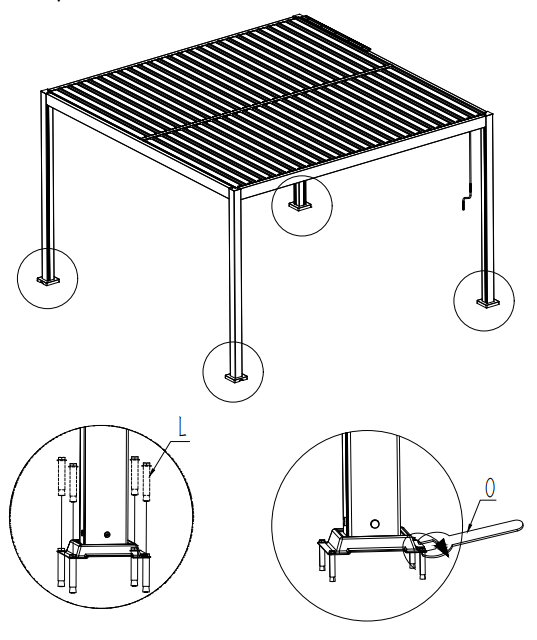
- Drill holes into the ground where you would like to secure the pergola.
- Secure the pergola into place using Part L and the provided spanner (Part O).
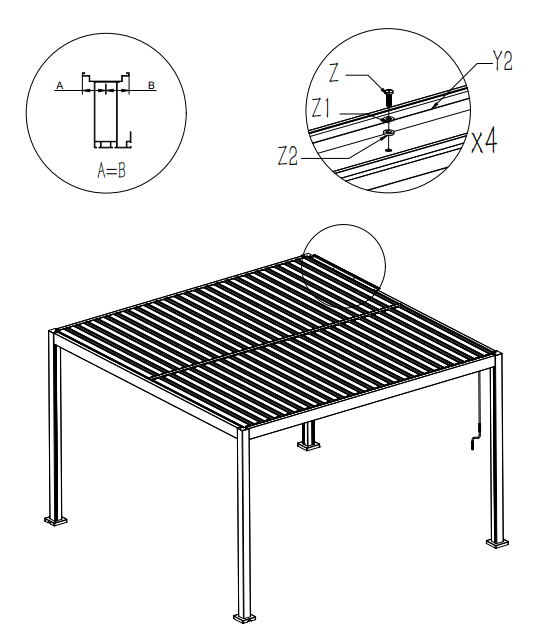
- Place Part Y2 against the edge of the pergola structure. Secure into place using the Z bolts and both thicknesses of washer.
- Plug Part Y1 into Part Y2 and into the corner of the pergola.
Maintenance
To maintain durability and aesthetic appeal, please follow these care and maintenance instructions.
Regular Cleaning
To keep your aluminium pergola looking its best, clean it regularly using the following steps:
1. Dust Removal – Use a soft brush or cloth to remove dirt, leaves, and debris.
2. Mild Soap Wash – Mix warm water with a mild detergent and use a soft sponge or cloth to clean the frame.
3. Rinse Thoroughly – Use a hose with low pressure to rinse off any soap residue. DO NOT use a pressure washer.
4. Drying – Wipe down the structure with a dry, lint-free cloth/microfibre cloth to prevent water spots.
Periodic Maintenance
Perform a thorough inspection every 3-6 months:
• Check for Loose Bolts and Fasteners – Tighten any that may have loosened due to weather conditions.
• Inspect for Corrosion or Damage – While aluminium is resistant to rust, prolonged exposure to harsh elements may cause minor surface wear.
• Lubricate Moving Parts – If your pergola has adjustable louvered sections or sliding components, apply a silicone-based lubricant to ensure smooth operation.
• Examine Drainage Systems – Ensure gutters or drainage holes are free from blockages.
Weather Protection
• Storm Precautions – If high winds or storms are forecasted, secure any loose parts and remove any hanging accessories.
• Winter Care – If you experience snow, periodically remove any heavy accumulation to prevent excess weight on the structure.
• Sun Exposure – Aluminium is UV-resistant, but prolonged exposure may cause fading. Consider applying a protective wax coating for added longevity.
Avoid Harsh Chemicals
• Do not use abrasive cleaners, ammonia-based solutions, or strong solvents as they can damage the powder-coated finish.
• Avoid using steel wool or hard-bristle brushes to prevent scratching.
Storage and Seasonal Considerations
• If not in use for an extended period, consider covering the pergola with a breathable, weatherproof cover.
• Store removable accessories, such as fabric canopies or curtains, in a dry and sheltered location.
Warranty and Professional Maintenance
• Refer to the manufacturer’s warranty for specific maintenance requirements and coverage.
• If structural repairs are needed, contact a professional installer or the manufacturer to avoid voiding the warranty.
By following these simple maintenance steps, your aluminium pergola will remain in excellent condition for years to come. Enjoy your outdoor space with confidence!